This is my depth of field & aperture video, where i tested the different styles of shots i could possible use for my music video.
Monday, 28 November 2011
Friday, 18 November 2011
Thursday, 17 November 2011
Ideas...So far
For my opening scene, i hope to have a panning shot towards the bench where the man is passed out, before the song has started. I am then thinking of having a close up on a beer can, and when the man kicks off the can onto the floor the music starts. This will display and challenge my continuity in editing and filming. After this the man will awake from passing out on the bench, light a cigarette, and recite the first verse of the song, to show that he is talking to himself. For the majority of the music video and for segments of the start of the video, i hope to use similar equipment such as a GoPro camera but reversed, so that it follows the body and face with a close up shot. After the verse is finished and the dubstep part of the song is about to start (the drop) i will use blur effects and cross over of footage to represent the man remembering his night out and what happened. This will continue to club shots, having a laugh in town with his mates, pulling girls e.t.c (typical shots from a night out). For the next verse i will cut back to the man on the bench, and i have an idea where he will go to a public toilet and look in the mirror, which i think will be a really good shot. I will weave all these shots together throughout the video. And near the end of the song it will show the man recalling going back to the bench he woke up on, and he will walk away in the distance and the final shot will be a pan down underneath the bench, where an ipod (presumably the mans) is playing the song i am using Dubba Jonny All In.
Thursday, 10 November 2011
Photoshop Tutorial 2
This is my second tutorial, on how to add glow lines around a rendered image.
Firstly, i created a new project and filled the background layer with a solid black colour.
Next, I inputted a rendered image for photoshop, and put it in front of the background layer.
Next, I drawed a path with the pen tool, and added a stroke path.
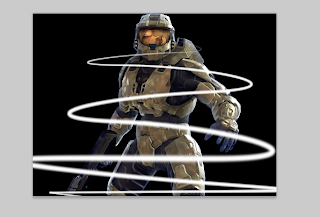
This is the effect created by adding a stroke path.
Next, I used the erase tool to edit the stroke path, to where i wanted the glowing lines to appear.
I then went to blending options, and added an purple outer glow to the layer.
I also added an inner shadow to the glow lines.
This is the original image I used.
This is the final image.
Friday, 4 November 2011
Photoshop Tutorial 1
For my first photoshop tutorial I decided to learn and use the bleach contrast boost & satin effect on a photo. Above is the original photo I used for this tutorial.
First of all I opened up the photo in Adobe Photoshop CS4 and changed the adjustment layer to black and white as shown above.
I then created a new layer above the background layer and added a soft light layer to the picture. This working in conjunction with the black and white layer gives the original picture more definition and makes key colours such as blacks and whites stand out.
Next I added Satin, by putting the blend mode to multiply and changed the colour to purple. This gave
the picture a purple tint.
I then clicked on the contour option in the satin menu which allowed me to adjust where the purple tint is shown around the picture, which gives it a nice wavy effect.
This is the final image.
Subscribe to:
Posts (Atom)


